


Unfortunately I started this project before I entered the bloggy world, so I had already painted the legs. So here's a pic of the before that I do have (it is just the top of the bench with the old fabric).

My first thought was to use this in a similar way, at the end of the bed as a place to put pillows on at night, or to sit down and put my socks and shoes on in the morning. In order for it to work with our master bedroom, I had to find a fabric that flowed nicely with our room, a grey would be perfect. After spending some time in the fabric store and unable to decide on a pattern, I threw my hands up. Well, if you can't bring a pattern into a room, then you should bring in a texture. I found this grey fabric that resembled corduroy, perfecto!

Well, the night that I decided I was going to sit down and finish this one off, my eyes began to wander. I was thinking about how we are always bringing out our fold out chairs for dinners and get togethers and dragging them outside or end up with them around the table, and I didn't realize until that moment how much I loathe those folding chairs.
I broke out the tape measure and realized this bench would go so great under the large window in our dining room. It was a perfect fit, and when the hubs sat down at it, it was a surprisingly good height for the dining room table. This could provide 2 extra seats as well as some aesthetics, SOLD! There is only one problem with this scenario, I used the gray corduroy to cover it and my colors downstairs are very earthy with tans, greens, and oranges (it is very fall oriented). In the end, I think it will be used in the master, but I know what the solution to my folding chair problem is, so I am on the search for a new bench that needs a breathe of life, that I can incorporate into the function of our dining room.
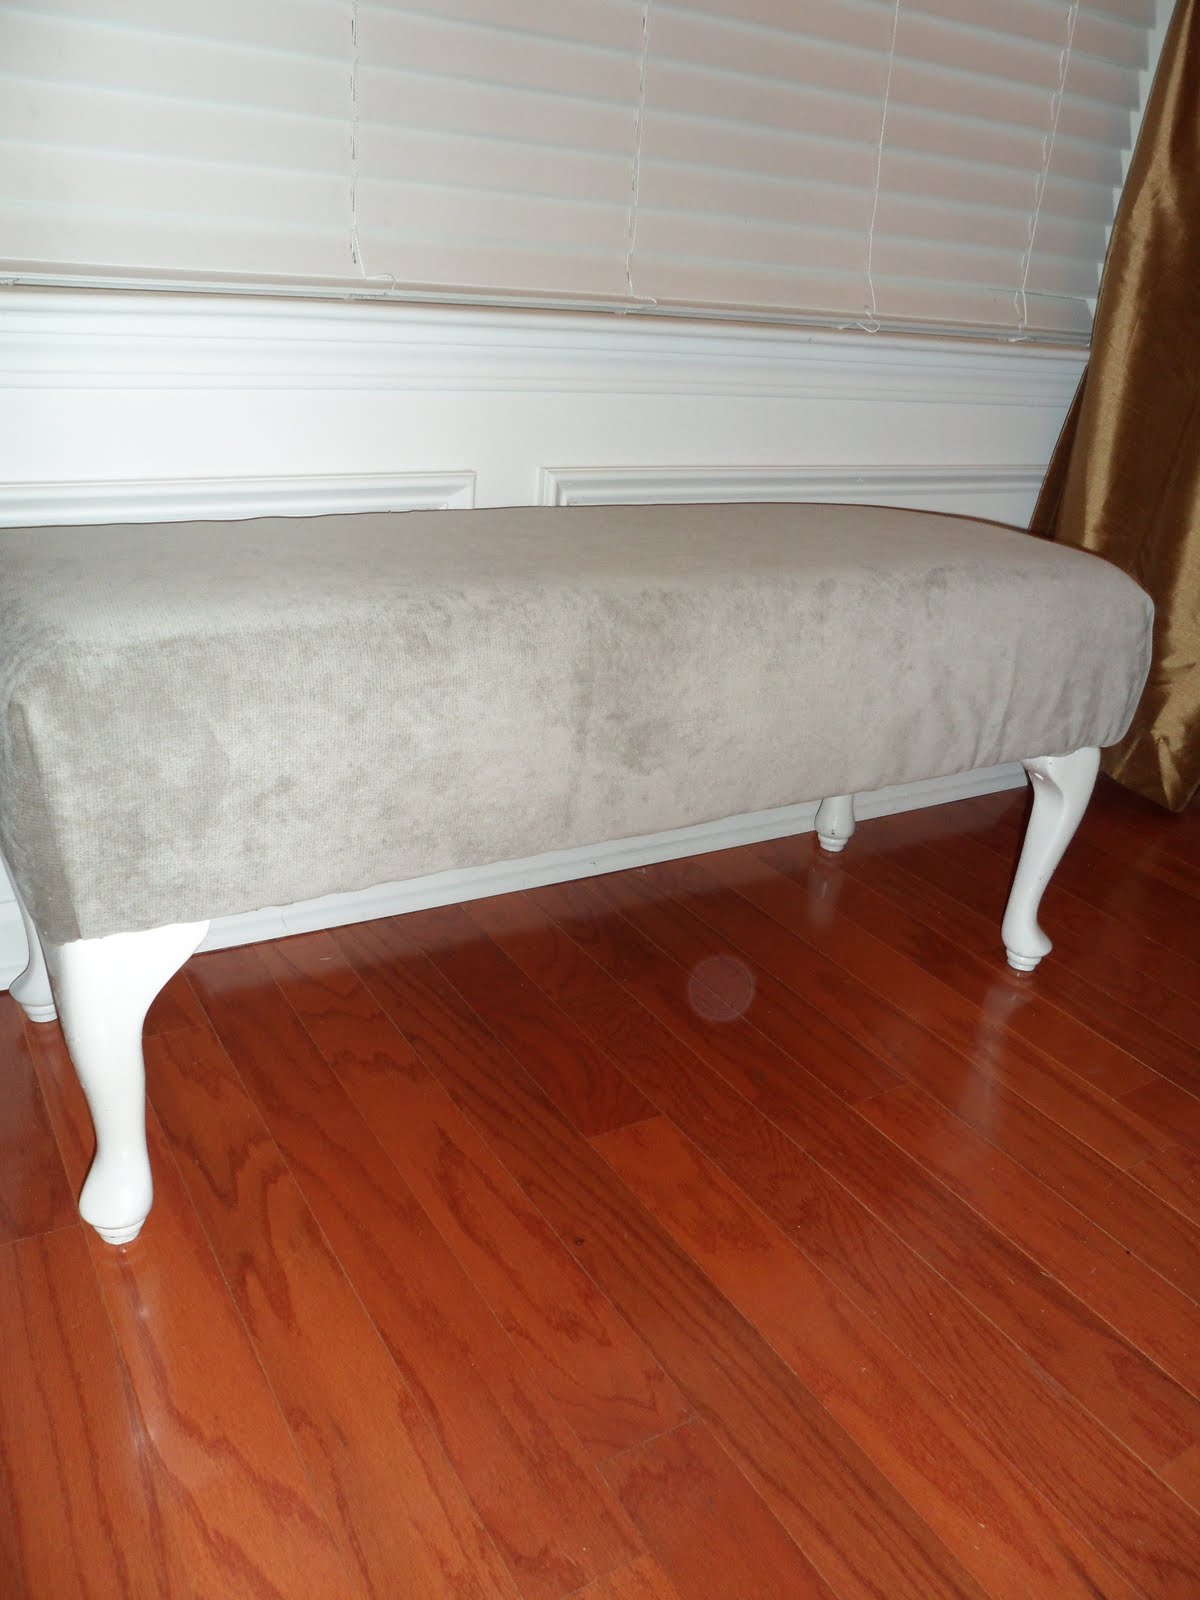
Here's a look at the finished project, under the window. Soon to be moved to the master...


My simple instructions:
- removed the legs and sanded, primed, and painted white
- removed the bottom layer of fabric and all of the staples
- cut my fabric to size (I bought 1.7 yards for 6 dollars at Old Time Pottery, and I have plenty left over..pillows?)
- wrapped the bench and stapled the fabric on the bottom with my staple gun
- The corners were a little tricky (as you can tell..hey, it was my first bench)
- screwed the legs back in and it was ready to go
Thanks for reading! :)

Love that fabric and the depth of the cushion. Looks just like one at West Elm I want to buy! I did an upholstered headboard similar to that on my blog.
ReplyDeletegreat transformationg it looks awesome! I want it!
ReplyDeletecome link up tomorrow at scrappy saturdays!
looks great! It does look so comfy.
ReplyDeleteYour new bench looks wonderful! Choosing a neutral fabric makes this piece usable in so many places.
ReplyDeleteThis looks like such a classic piece! Great job!
ReplyDelete$10 was a steal makeover! Very nice! :) And much better than the before I might add! Thanks for sharing on Fancy This Fridays!!!
ReplyDeleteThis looks so great -- I love it!
ReplyDeleteso cute! love those legs!
ReplyDeleteYou are a genius! What an adorable bench!
ReplyDeleteI would love for you to post this on my Fall In Love linky party today.
this is amazing! great job. love the colors.
ReplyDeletei would love for you to come link up this or any other amazing project at my creativity party going on right now!
letbirdzfly.blogspot.com
thanks so much for sharing!
It's really well done; very professional looking! Thanks so much for sharing your 'how to'.
ReplyDeleteI'm your newest follower. :)
Wow, I can't believe you did that for so little money. It looks so rich now! I am a new follower and would like to invite you to share this at The Real Life Tips Blog Link up that I am co-hosting. http://www.messforless.net/2011/09/real-life-tips-blog-link-up.html
ReplyDeleteVery elegant looking bench, nice job :D
ReplyDeleteVisiting from Happy Hour Project's Linky Party,
Smiles from NW Illinois,
Suzanne
Refab?! I love it! $10 is AMAZING! Thank you so much for linking up with the frog this week! I hope you will keep oming back anf inspiring all of us!
ReplyDeleteHUGS~
Jenni