


When I got it home I took a good look at it, the wood was in pretty good shape but I did not care for the top glass doors. I knew those would not be used in my refab. I also wanted to update the hardware, I found the hardware I used at home depot and I just fell in love with it, then when I saw the price tag of $1.39 a pull, I knew it was fate! The hutch also had 18 wood plugs along the sides that looked like bolts. I found the exact size of the plugs that were in the original version of the hutch and I bought a set of 50 of them for under 3 dollars. I spray painted them black to match the hardware.
Anyways, check out these before pictures.


I knew that I wanted to either wallpaper or put fabric on the back of the upper cabinet. I remembered that I had this fabric laying around from when I had reupholstered our dining room chairs. Our living room/dining room is very open so I thought that this would help tie the two spaces together.
After a morning of thrifting and hitting a few garage sales, I dragged my mom with me to Michaels. We bought foam board and spray adhesive. I measured the back of the upper cabinet and we cut the foam board to size. We then sprayed the foam board with the adhesive and wrapped it in our cut fabric. Below is a picture of half of it inserted, and the finished product.


Well, after about two weeks of work I finished my first true overhaul and I absolutely LOVE the way it turned out! Special shout out to my hubs who helped me and taught me so much, and my mom for helping me install the fabric backing! I can not wait to do another one! Here are some more pictures I took of the final product, enjoy!!
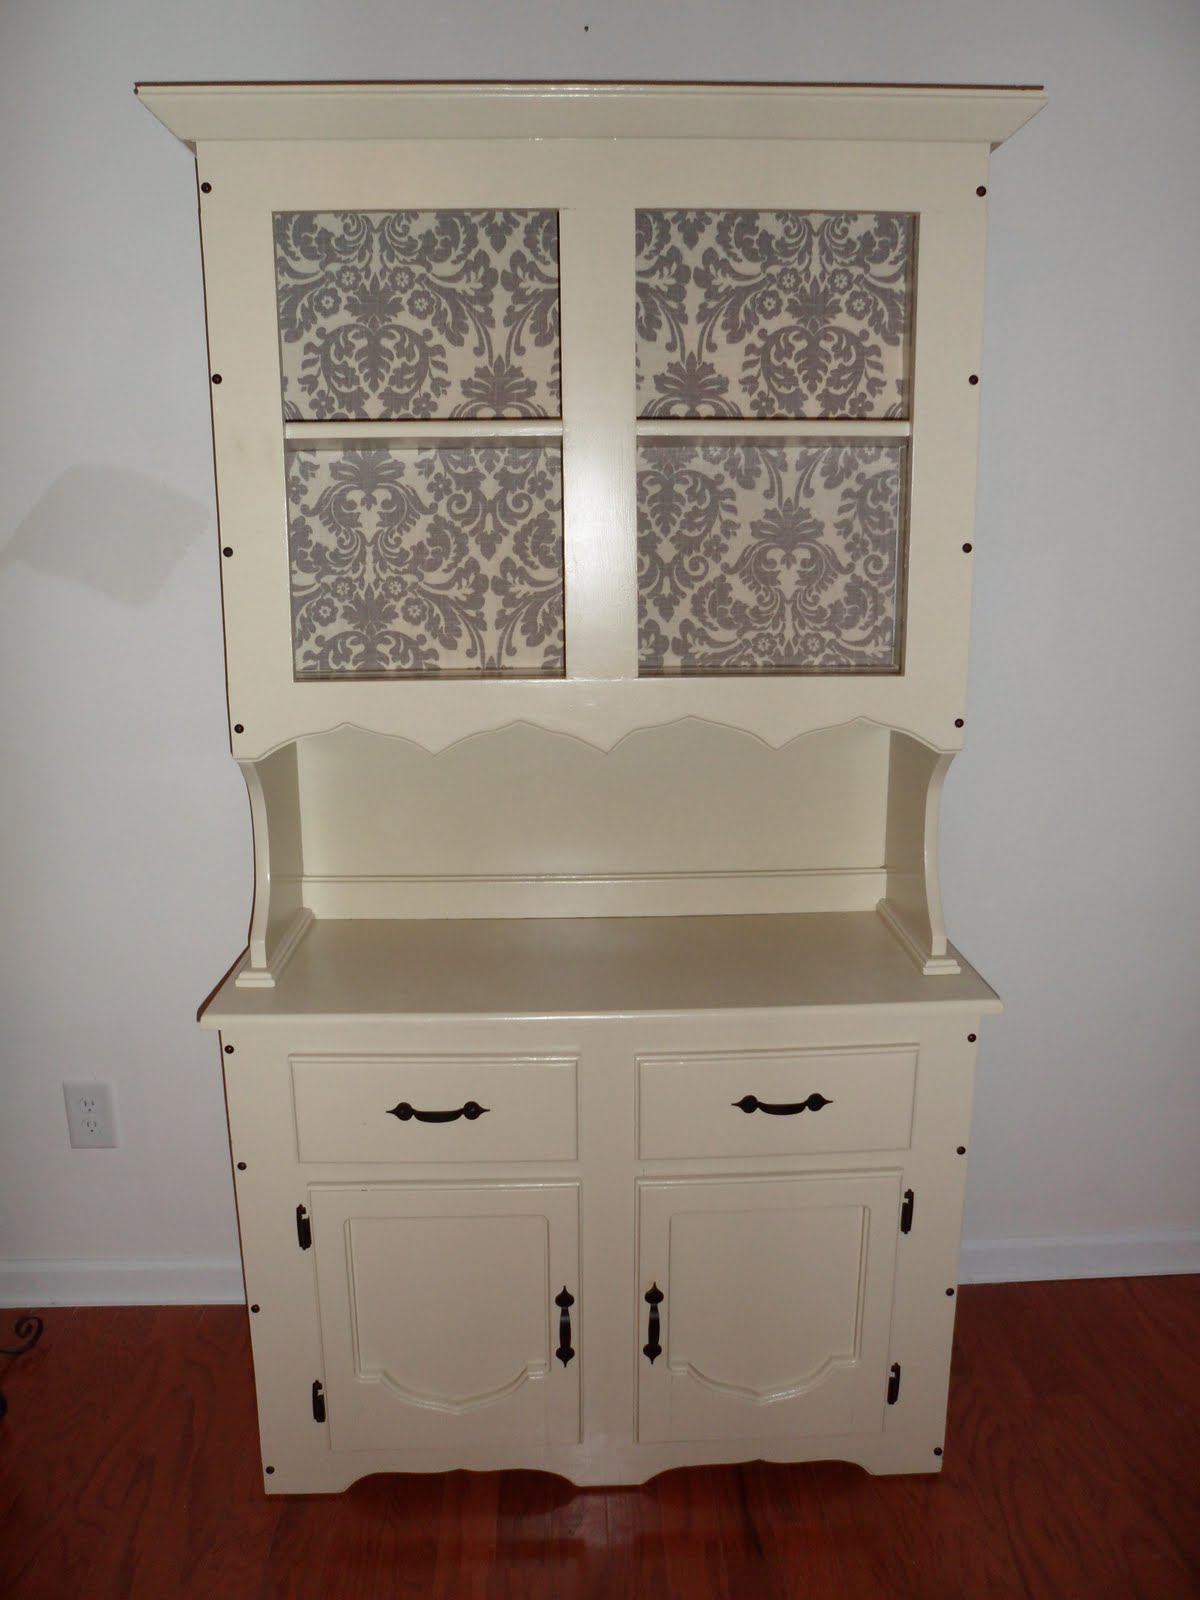


(decorated with stuff around the house, this will probably change, but just to get an idea)
Thanks for reading!!

Awesome job Kelli!! Love it. It looks so good!
ReplyDeletefabulous job...I have a hutch myself that is waiting for an overhaul...soo mnay projects so little time!
ReplyDeleteJulia
This hutch looks beautiful! Great job! Thanks for linking up on "Creative Bloggers' Party & Hop"!
ReplyDeleteFrom this week's party co-host:
Jacque @ Jacque's Soda Parlor
thesodaparlor.blogspot.com
P.S. I'm your newest follower!! :)
It looks great! I actually have a similar piece that I haven't done anything with yet. The bottom part is in my kitchen, holding my hand-towels and dishcloths, and the top is on baby-to- be's dresser. I've been thinking about using the whole piece in the kitchen for cookbooks, and other things. Thanks for the inspiration!
ReplyDeleteCome and link this to WorkShop Wednesday this wednesday. I would love to feature it!
ReplyDeletethe makeover looks fantastic.
ReplyDeletelove the fabric choice!
cheryl xox.
you did such a wonderful job! Your china dresser is completely adorable - LOVE it!
ReplyDeleteWOW! Very, very nice re-do! Looks awesome!
ReplyDeleteGreat job! I have often seen these hutches at thrift stores for under $25 because no one knows what to do with them. This is inspiring!
ReplyDeletenow I know what do with the hutch in my mom's garage.
ReplyDeleteI will be honored if you will add this project in our weekly linking party every Wednesdays at
http://www.passionatelyartistic.com/2011/08/my-inner-baker-with-linking-party.html
Have a great week,
Maggie
http://passionatelyartistic.com
Love the redo...getting ready to change my kitchen hutch from British Red to Antique White...yours is a great inspiration...plan on using burlap on mounting boards for the back...
ReplyDeleteWill definitely be following your blog from now on...
Donna
Tinglelaneprimitives.blogspot.com
The cabinet is indeed fab!
ReplyDeleteWhat a wonderful cabinet and wonderful job updating her prettiness. Found you via Someday Crafts and have become your newest follower. Pop on over for a visit if you get a moment.
ReplyDeleteTootles, Kathryn
http://thededicatedhouse.blogspot.com/2011/07/falling-off-pink-cloud-and-landing-on.html
This looks great! I love the contrast of the dark pulls, too.
ReplyDeletewhat a great change! its amazing how the same piece can look so different!
ReplyDeleteLooks great and I like the paper lining the back walls of the cupboard!
ReplyDeleteLove that transformation!! Great job!!
ReplyDeleteNew follower! I love your hutch! I've been looking for one to redo myself. Yours looks amazing!
ReplyDeleteGorgeous! You did a great job! I love the antiqued look! And the paper lining is genius! Love it all!
ReplyDeleteI am hosting a fun giveaway & would love to have you check it out--
http://southernlovely.blogspot.com/2011/08/uprinting-giveaway.html
that cupboard was so 1983 before you got your talented hands on it...love the makeover...especially the pretty paper...thanks for linking up to fridays unfolded!
ReplyDeletealison
Your hutch looks great! So much brighter than it was. Nice job. Visiting from Serenity Now.
ReplyDeleteWhat a fantastic transformation! It looks absolutely gorgeous and we are so glad you shared it with us at Inspiration Friday this week!
ReplyDeleteVanessa
Love the makeover! I am a damask and toile girl, so I love your choice of fabric, too!
ReplyDeleteOne thing I noticed that you did not mention is that you turned the bottom doors upside down. Was that something you planned or was it a happy accident?
Thanks for sharing your makeover!
Jenny
It doesn't even look like the same piece of furniture...great remodel. I'd enjoy it in my home. I'm visiting from Inspiration Friday. Visit Bible Love Notes if you have a chance (http://biblelovenotes.com) Thanks!
ReplyDeleteSomebody has a feature... *wink wink* Hope you'll pop over and grab a featured button from Truly Lovely! http://trulylovelywiththelaneysisters.blogspot.com/2011/08/fancy-this-features-38.html
ReplyDeleteI featured this post- come stop by and see! WorkShop Wednesday
ReplyDeleteThat turned out fantastic! Thanks for linking it up to Home Sweet Home!
ReplyDeleteSherry
Lovely! I love the fabric you chose! Great re-do!
ReplyDeletebeautiful!! like a new piece of furniture!
ReplyDeleteit looks beautiful- i especially love the pattern behind the glass! it adds a nice touch of glam!
ReplyDeleteYou have done a beautiful job on the hutch, and I'm sure you have given many others a great idea to freshen up an old piece of furniture. Great Tutorial.
ReplyDeleteI would love to have you to link up at my weekly Clever Chicks Blog Hop: http://www.the-chicken-chick.com/2013/11/clever-chicks-blog-hop-59-with-egg.html
I hope you can make it!
Cheers,
Kathy Shea Mormino
The Chicken Chick
http://www.the-chicken-chick.com/